This explains you to how to create SharePoint Provider Hosted App with Microsoft Azure,
Prerequisite
- Office 365 site (you can create Free trial site from Microsoft).Create Office 365 Account
- Microsoft Azure Account ( you can create free trial account from Microsoft).Create Azure Account
- Microsoft Visual Studio 2013 or 2015 (I’ll explain with 2013).
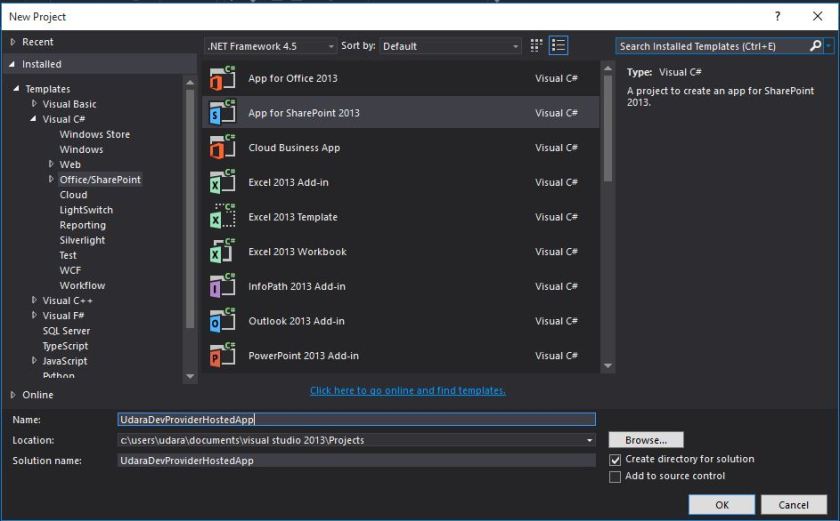
Step 01.
Start a new Visual Studio Project, use the “App for SharePoint 2013” template as in the following list.
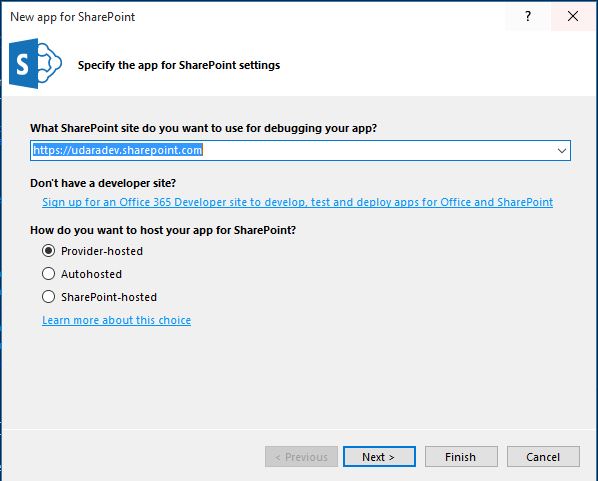
Step 02.
Select the Provider-hosted option for this example. In a Provider-hosted app, application resources will be deployed in a server outside the SharePoint environment.Enter Your SharePoint office 365 site as Debugging App.
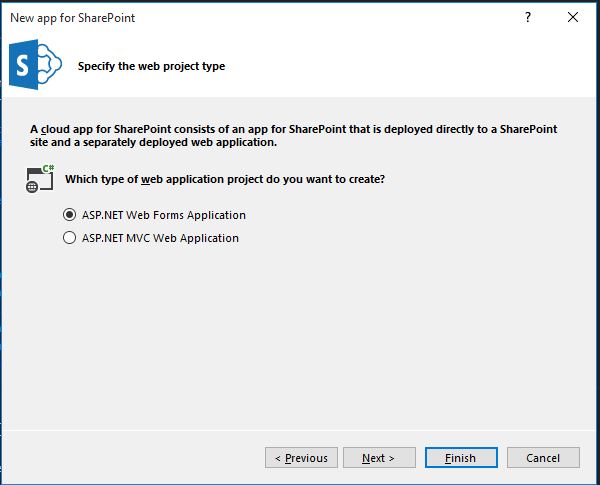
Step 03.
Select the type of web project you want to Host.I select “ASP.net Web form Application”,this step is most related to development architecture.(Ex. Tiered Architecture or MVC) .
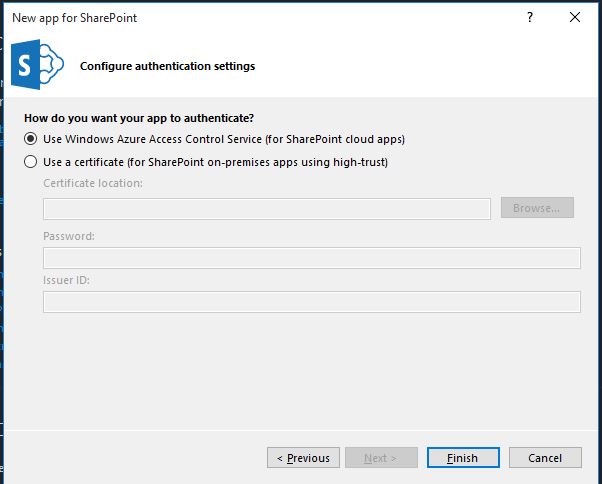
Step 04
In the next step, select “Use Client secret (requires a SharePoint farm connected to ACS)”. We will be using the Access Control Service (ACS) available with Microsoft Azure for this example.Simply Access between Hosted Account (Azure).
Step 05.
Click “Finish” and the project is created for you by Visual Studio. You can see two projects created under the solution. The first project consists of just an app icon and AppManifest.xml that manages all the settings like start URL, permission, Query strings, Client ID, Tokens and so on.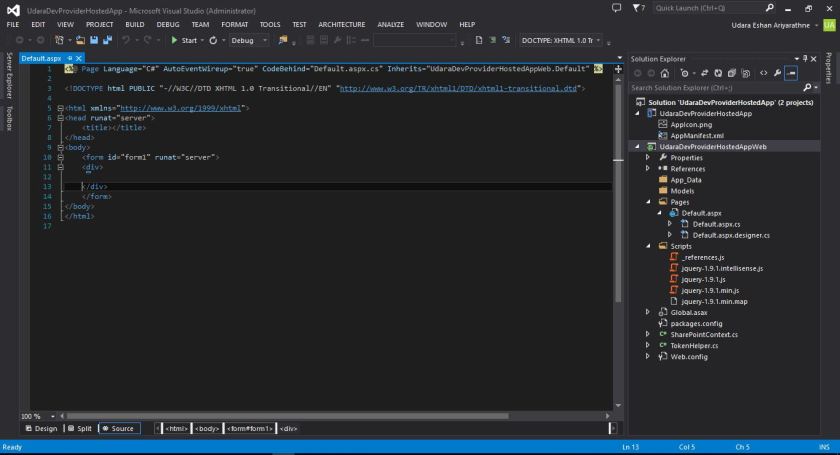
Step 06.
The next step is to register a new app using client Id and Client Secret.
- Go to the “/_layouts/15/appregnew.aspx” page of your SharePoint site (in my case, it is https://udaradev.sharepoint.com) to generate the client Id and client secret id,
- Click on the generate buttons of Client Id and Client Secret to generate both.
Step 07.
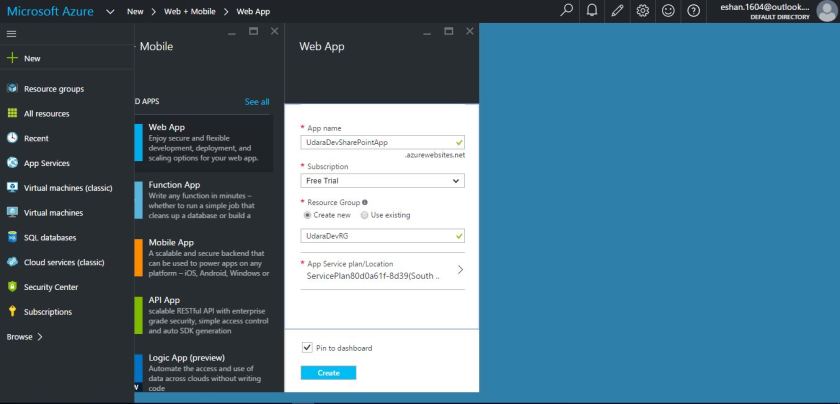
We need to fill in “App Domain” and “Redirect URL”. In fact, this is the website where the app is hosted. I am using Microsoft Azure to host my app. Let us go to the Windows Azure Management Portal and create a web site to host your app.
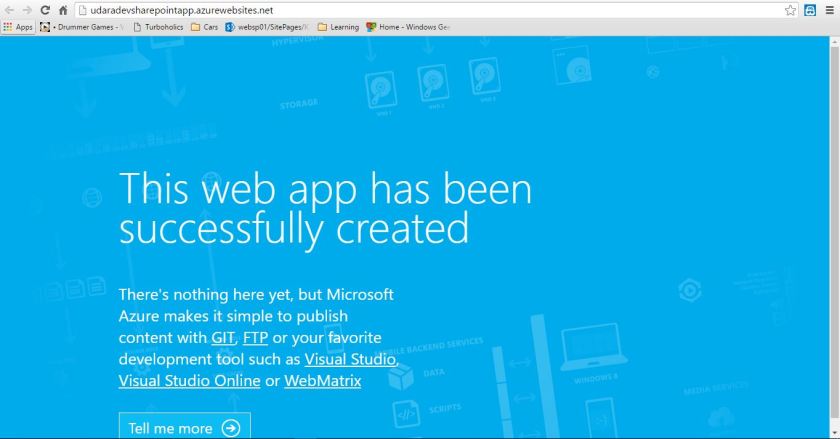
Step 08.
This the Web Site I have creted on Azure and credted Azure Site Details.

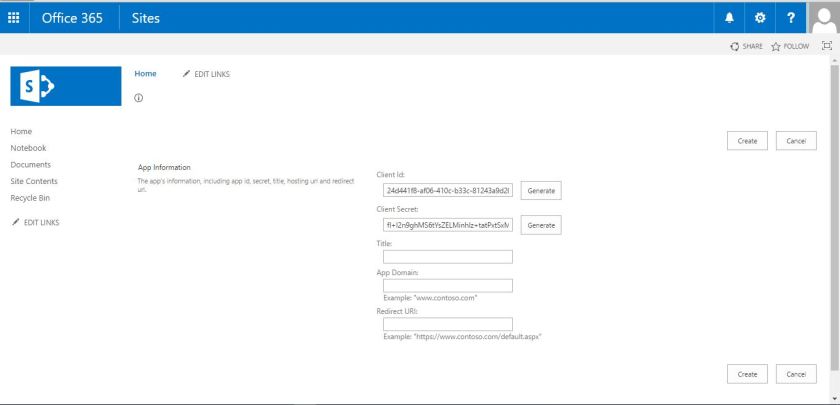
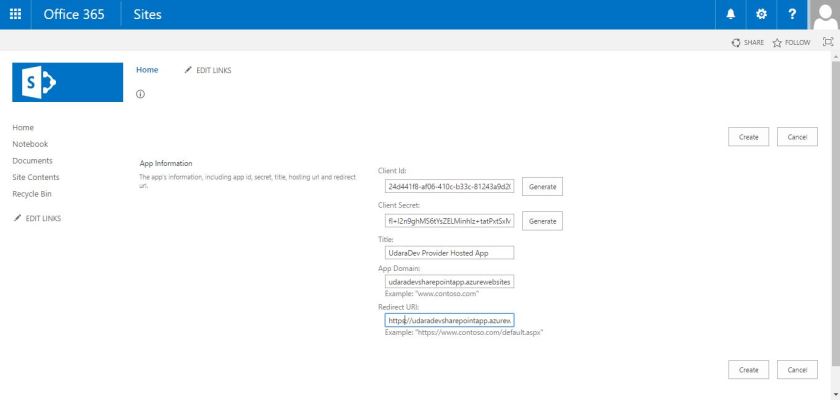
Step 09.
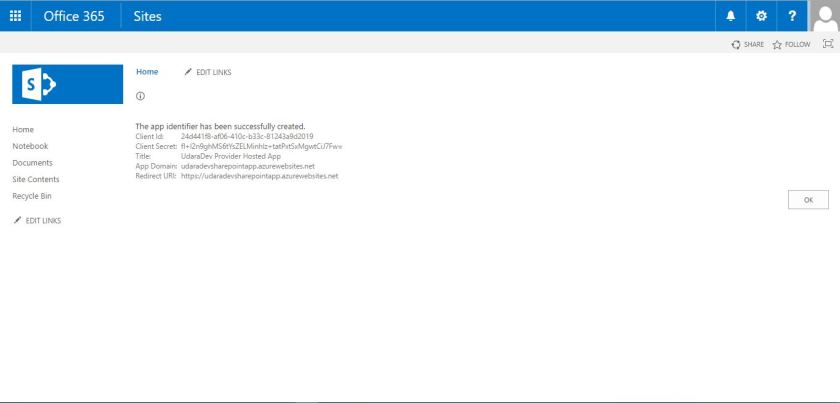
Enter Azure Site details on SharePoint App Registration form and press create button, then you will see App Identifier created message.
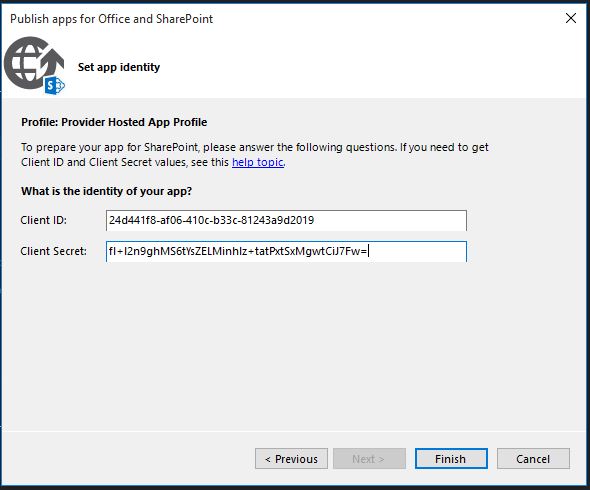
Copy the Client Id and Client Secret to a safe place.
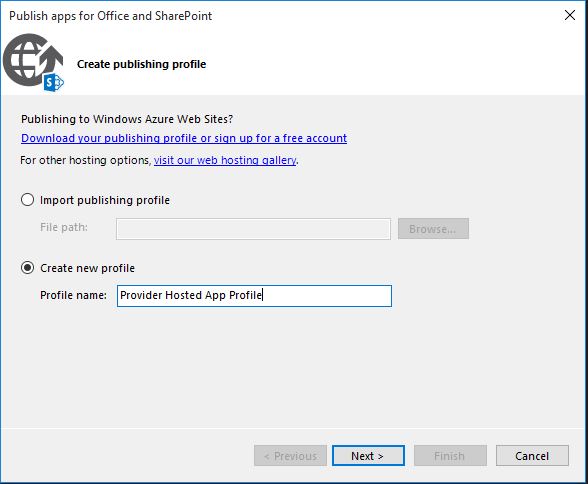
Step 10.
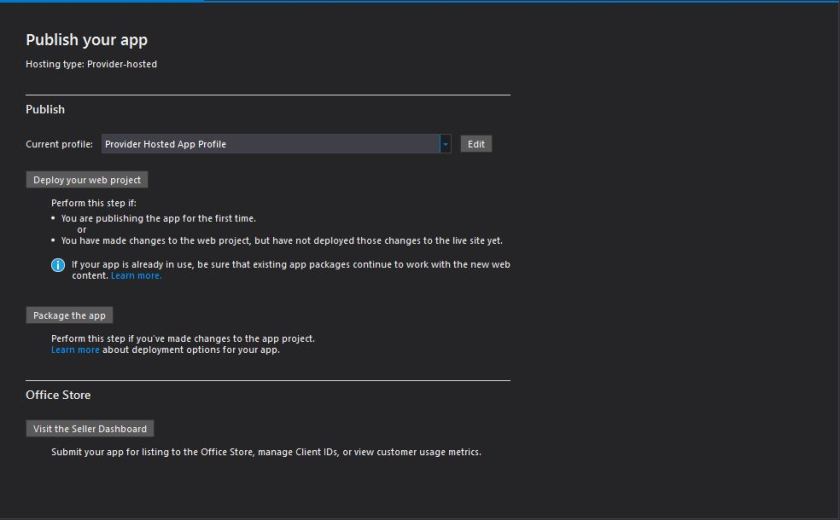
The next step is to publish both projects separately. First, publish the app project as in the following
Enter Client Id and Client secret in below form and click finish.
Step 11.
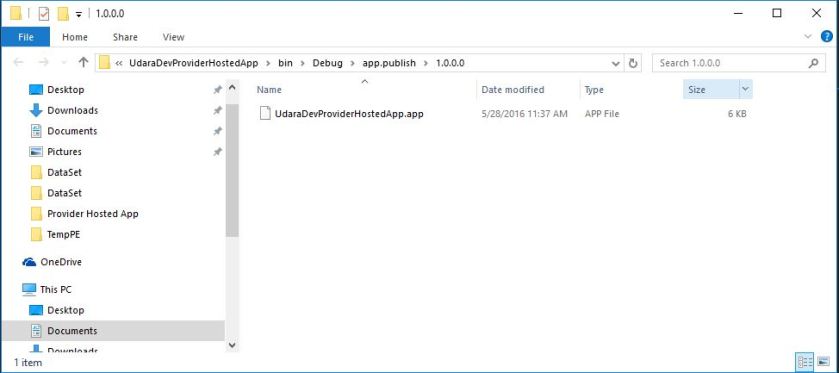
Click Package your App,then you have to enter Azure Web site url and Client Id. After that Packed App file folder will open as below sreens.
Enter Url of Azure Web Site.

App file folder Location
Step 12.
Upload App File to SharePoint Site. You Should upload App file to Developer Site not a Team Site. Go How to Create Developer Site
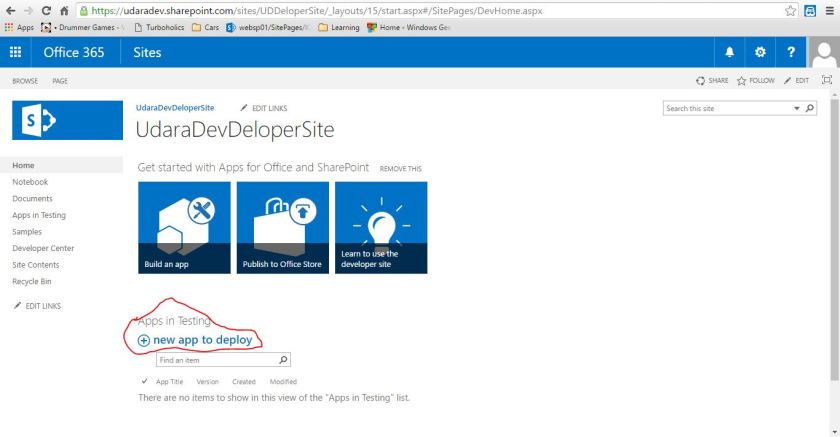
- Then it’ll pop up App upload Panel
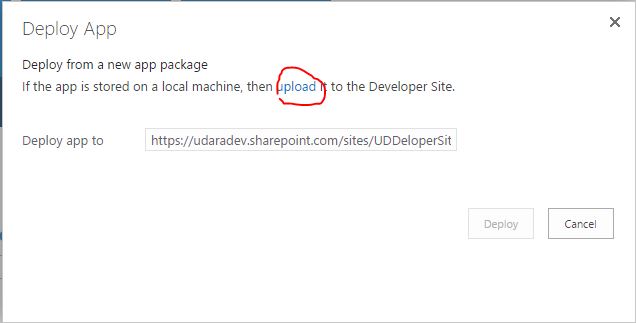
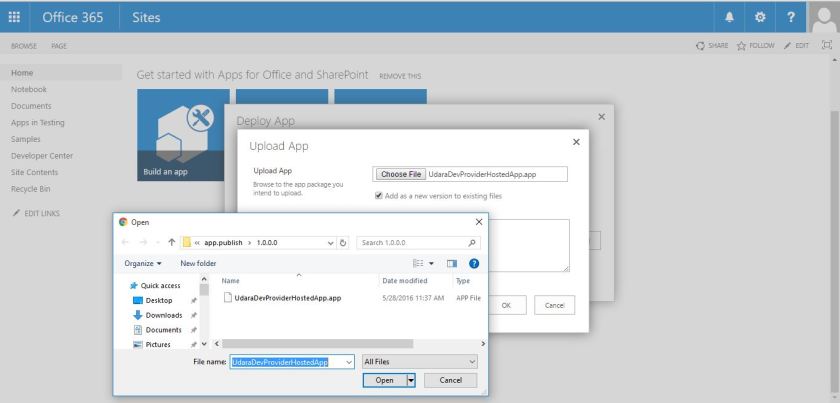
- Click on Upload link and Upload you packaged App solution.
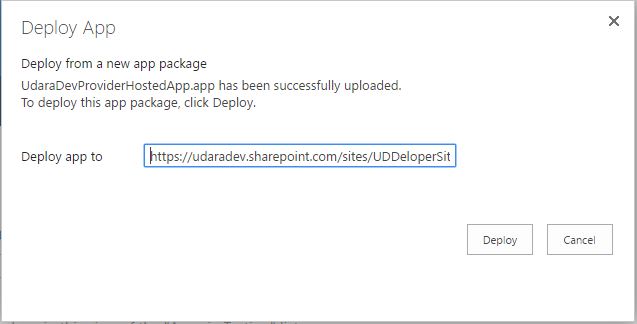
- After successfully uploaded it’ll pop-up below screen,then press deploy button.
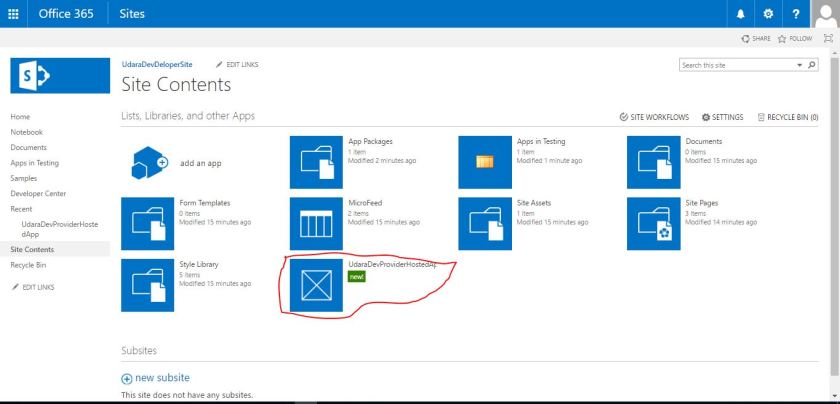
- Now You can see your App on Site contents.
Step 13.
Click on App it’ll become server error , because we haven’t deployed the remote web to Microsoft Azure. The next step is to deploy the web app to Azure.

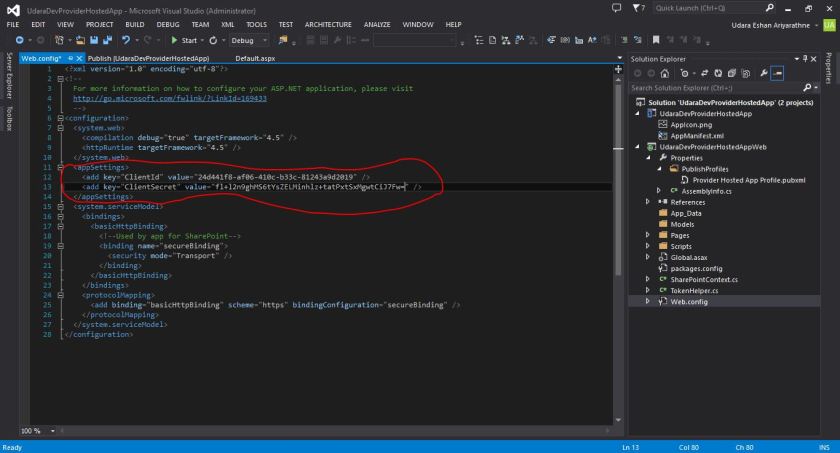
Step 14.
Publish the application to Microsoft Azure. Open web.config and update the client ID and Client secret as in the following
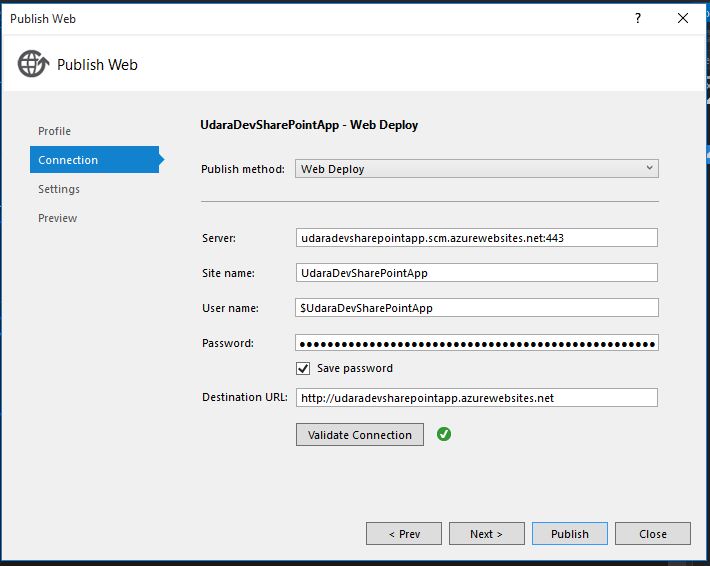
Step 15.
Then Publish the Web Solution to Azure, You can download Publish Profile settings from Azure Web site Setting.
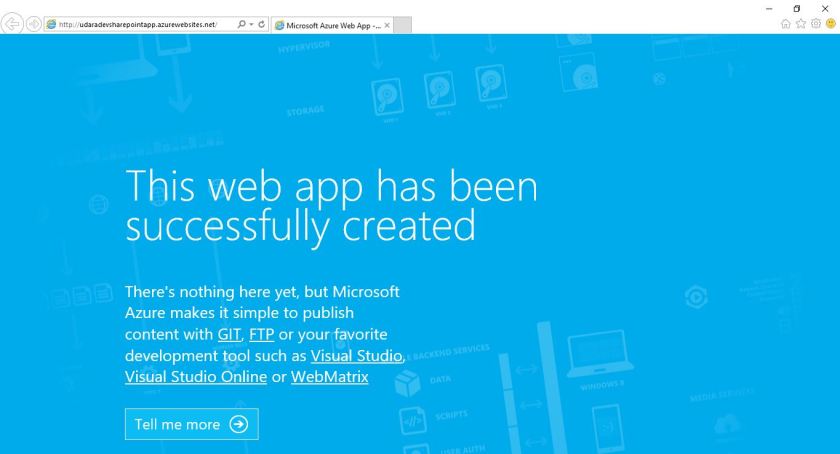
Step 16.
After Successfully published you can retrieve Azure Web Site.
Step 17.
Finally you click on app on SharePoint you can see app works as below.

Another thing get basic idea about App configuration from “AppManifest.xml”,Ex. App Startup page.

Thanks,