//pagead2.googlesyndication.com/pagead/js/adsbygoogle.js
(adsbygoogle = window.adsbygoogle || []).push({
google_ad_client: “ca-pub-4949947405553600”,
enable_page_level_ads: true
});
In this post, I’m going to show how to build ASP.net Core Web Application with Razor Pages.
Razor Pages is a new aspect of ASP.net core MVC, Razor pages make a coding page focused approach to develop web applications.
Prerequisites,
- Visual Studio.
- .net Core SDK.
Let’s move to project set up,
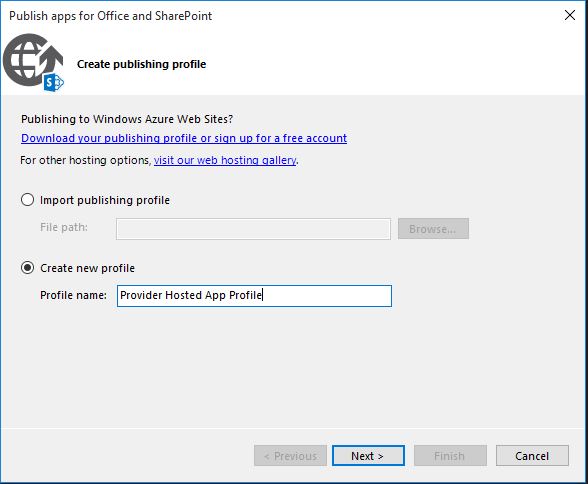
Step 01,
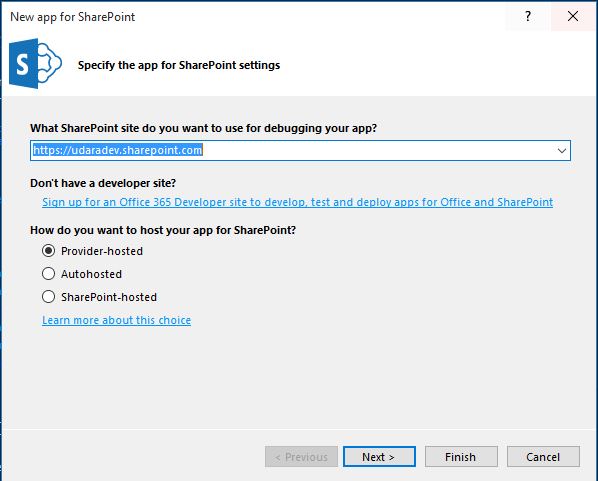
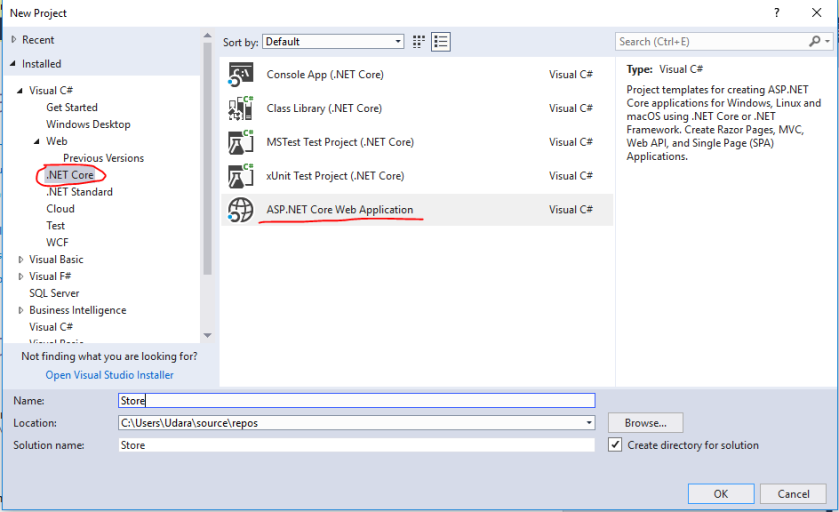
- From the Visual Studio File menu, select New > Project.
- Create a new ASP.NET Core Web Application. Name the project Store.
Step 02,
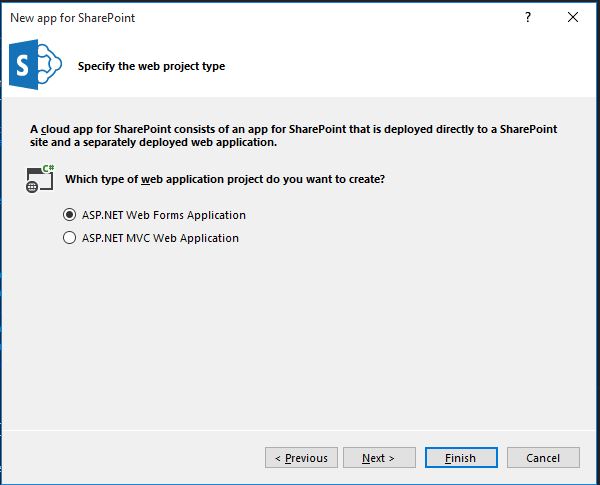
- Select ASP.NET Core 2.1 in the drop-down, and then select Web Application.
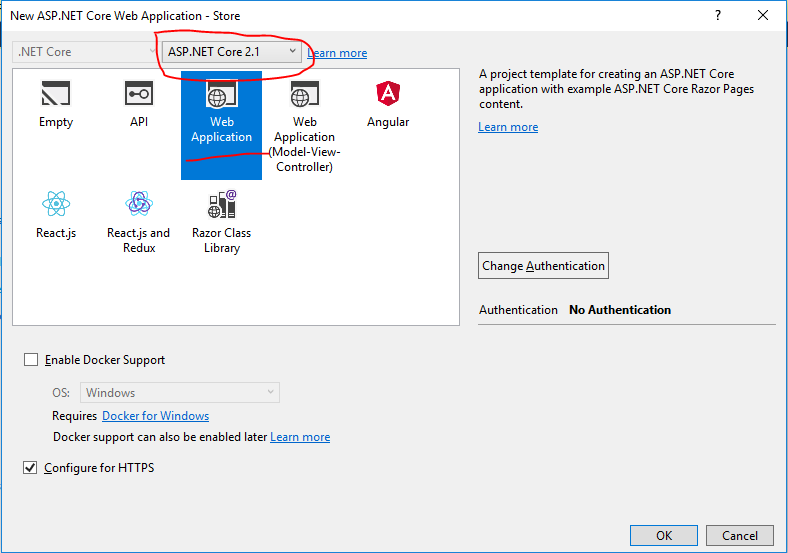
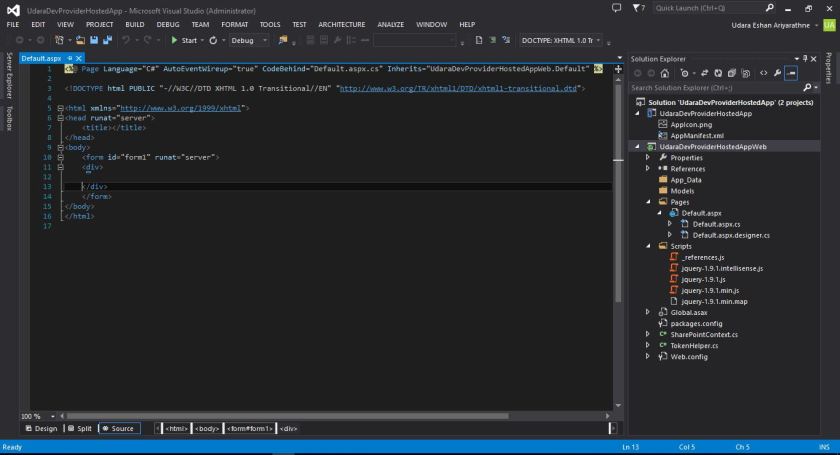
- Then Visual studio template creates a Razor Project.
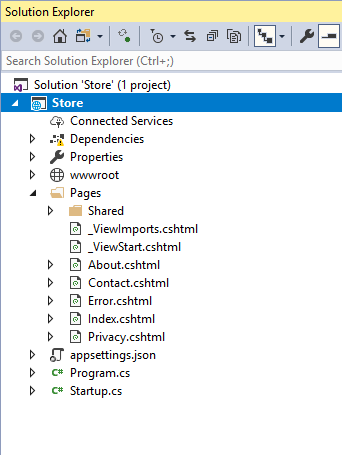
- After Successfully creates the project you can run it.
Step 03,
Now we are going to Connect with Database using Razor App,
We are going to implement App using Entity Framework DB Approach.
To use EF Core, install the package for the database provider(s) you want to target. This walkthrough uses SQL Server. For a list of available providers see Database Providers.
- Tools > NuGet Package Manager > Package Manager Console
- Run
Install-Package Microsoft.EntityFrameworkCore.SqlServer
We will be using some Entity Framework Tools to create a model from the database. So we will install the tools package as well:
- Run
Install-Package Microsoft.EntityFrameworkCore.Tools
We will be using some ASP.NET Core Scaffolding tools to create controllers and views later on. So we will install this design package as well:
- Run
Install-Package Microsoft.VisualStudio.Web.CodeGeneration.Design
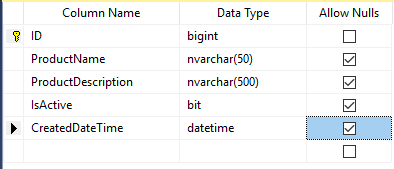
Create a Database Called “StoreDB” & then Create a table called “Product” with following columns,
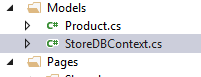
Then create the Entity Framework model based on your existing database.
- Tools –> NuGet Package Manager –> Package Manager Console
- Run the following command to create a model from the existing database:
Scaffold-DbContext “Data Source=295_LP1\SQLEXPRESS2012;Initial Catalog=StoreDB;User ID=sa;Password=123” Microsoft.EntityFrameworkCore.SqlServer -OutputDir Models
Step 04,
- In Solution Explorer, right-click on the Pages folder > Add > New Folder.
- Name the folder Movies
In Solution Explorer, right-click on the Pages/Movies folder > Add > New Scaffolded Item.
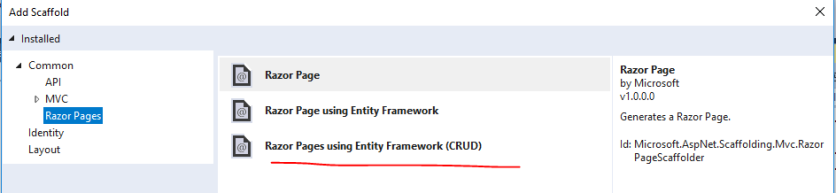
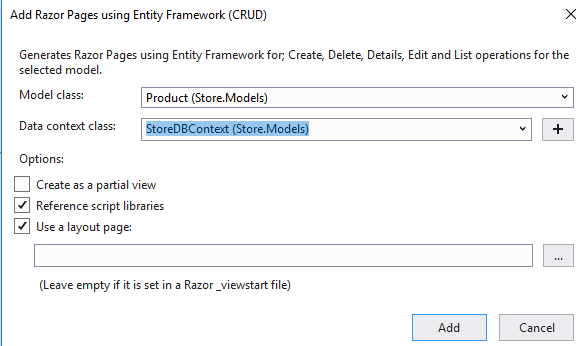
Complete the Add Razor Pages using Entity Framework (CRUD) dialog:
- In the Model class drop down, select Movie (Store.Models).
- In the Data context class row, select the + (plus) sign and accept the generated name Store.Models.StoreDBContext.
- In the Data context class drop down, select Store.Models.StoreDBContext
- Select Add.
To register as a service, open Startup.cs, and add the highlighted lines to the method.
public void ConfigureServices(IServiceCollection services) { services.AddDbContext<StoreDBContext>(options => options.UseSqlServer(Configuration.GetConnectionString(“DefaultConnection”))); services.AddMvc(); }
Open the appsettings.json file and add a connection string as shown in the following code:
{
“ConnectionStrings”: {
“DefaultConnection”: “Data Source=295_LP1\\SQLEXPRESS2012;Initial Catalog=StoreDB;User ID=sa;Password=123”
},
“Logging”: {
“LogLevel”: {
“Default”: “Warning”
}
},
“AllowedHosts”: “*”
}
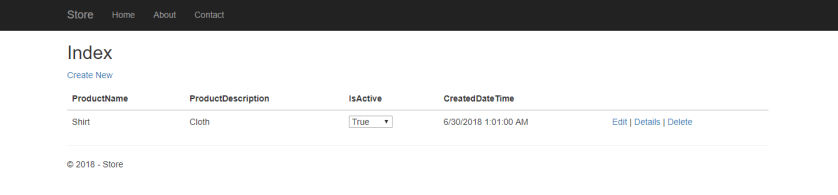
Now run your project,
Then you can do CRUD operations with Razor Web APP.