
Build ASP.Net Core Razor Page Application

//pagead2.googlesyndication.com/pagead/js/adsbygoogle.js
(adsbygoogle = window.adsbygoogle || []).push({
google_ad_client: “ca-pub-4949947405553600”,
enable_page_level_ads: true
});
In this post, I’m going to show how to build ASP.net Core Web Application with Razor Pages.
Razor Pages is a new aspect of ASP.net core MVC, Razor pages make a coding page focused approach to develop web applications.
Prerequisites,
- Visual Studio.
- .net Core SDK.
Let’s move to project set up,
Step 01,
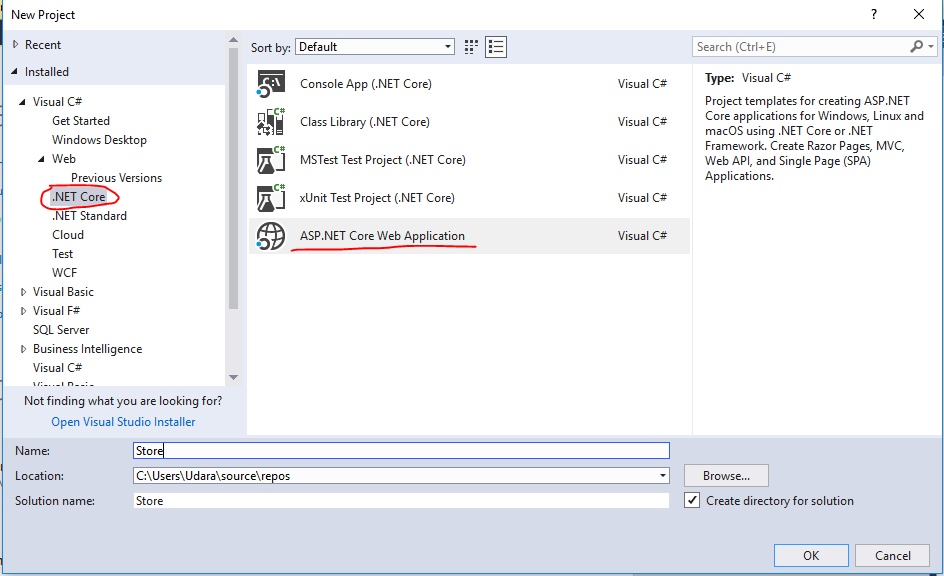
- From the Visual Studio File menu, select New > Project.
- Create a new ASP.NET Core Web Application. Name the project Store.
Step 02,
- Select ASP.NET Core 2.1 in the drop-down, and then select Web Application.
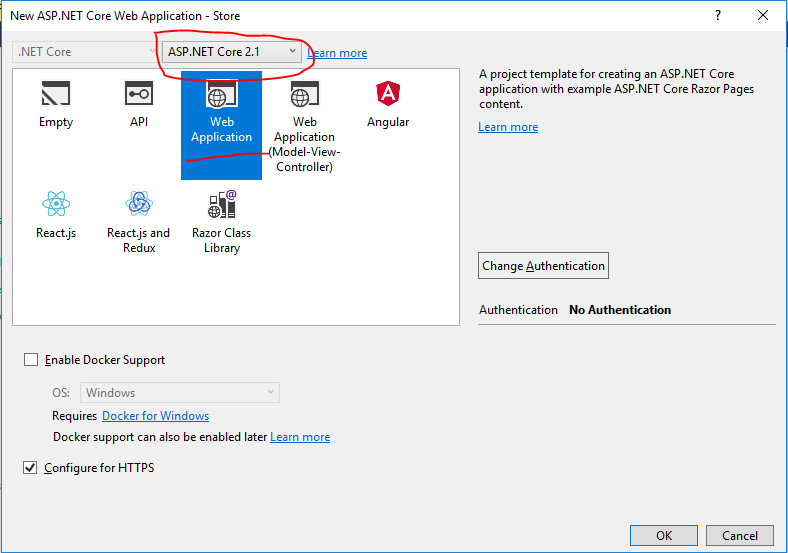
- Then Visual studio template creates a Razor Project.
- After Successfully creates the project you can run it.
Step 03,
Now we are going to Connect with Database using Razor App,
We are going to implement App using Entity Framework DB Approach.
To use EF Core, install the package for the database provider(s) you want to target. This walkthrough uses SQL Server. For a list of available providers see Database Providers.
- Tools > NuGet Package Manager > Package Manager Console
- Run
Install-Package Microsoft.EntityFrameworkCore.SqlServer
We will be using some Entity Framework Tools to create a model from the database. So we will install the tools package as well:
- Run
Install-Package Microsoft.EntityFrameworkCore.Tools
We will be using some ASP.NET Core Scaffolding tools to create controllers and views later on. So we will install this design package as well:
- Run
Install-Package Microsoft.VisualStudio.Web.CodeGeneration.Design
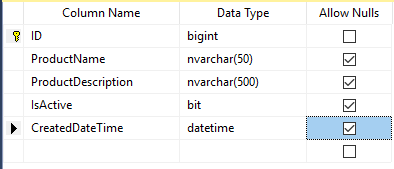
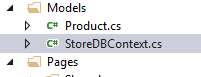
Create a Database Called “StoreDB” & then Create a table called “Product” with following columns,
Then create the Entity Framework model based on your existing database.
- Tools –> NuGet Package Manager –> Package Manager Console
- Run the following command to create a model from the existing database:
Scaffold-DbContext “Data Source=295_LP1\SQLEXPRESS2012;Initial Catalog=StoreDB;User ID=sa;Password=123” Microsoft.EntityFrameworkCore.SqlServer -OutputDir Models
Step 04,
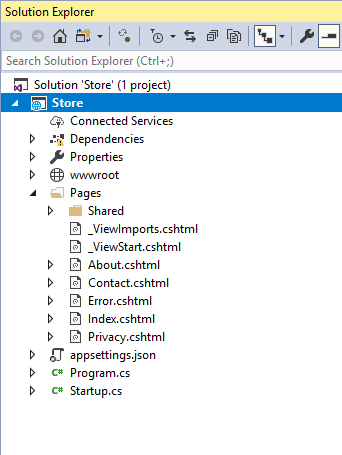
- In Solution Explorer, right-click on the Pages folder > Add > New Folder.
- Name the folder Movies
In Solution Explorer, right-click on the Pages/Movies folder > Add > New Scaffolded Item.
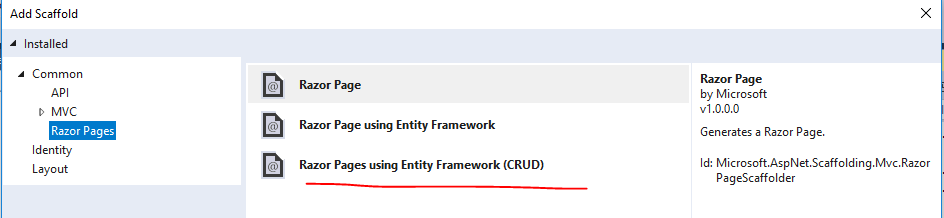
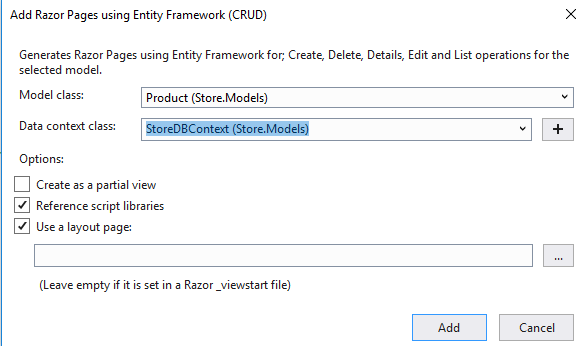
Complete the Add Razor Pages using Entity Framework (CRUD) dialog:
- In the Model class drop down, select Movie (Store.Models).
- In the Data context class row, select the + (plus) sign and accept the generated name Store.Models.StoreDBContext.
- In the Data context class drop down, select Store.Models.StoreDBContext
- Select Add.
To register as a service, open Startup.cs, and add the highlighted lines to the method.
public void ConfigureServices(IServiceCollection services) { services.AddDbContext<StoreDBContext>(options => options.UseSqlServer(Configuration.GetConnectionString(“DefaultConnection”))); services.AddMvc(); }
Open the appsettings.json file and add a connection string as shown in the following code:
{
“ConnectionStrings”: {
“DefaultConnection”: “Data Source=295_LP1\\SQLEXPRESS2012;Initial Catalog=StoreDB;User ID=sa;Password=123”
},
“Logging”: {
“LogLevel”: {
“Default”: “Warning”
}
},
“AllowedHosts”: “*”
}
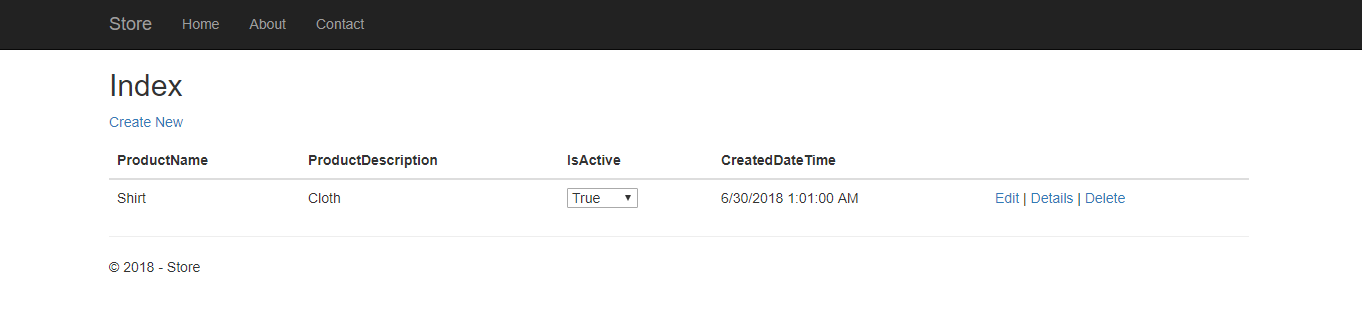
Now run your project,
Then you can do CRUD operations with Razor Web APP.
Build ASP.net MVC Project with Oracle Data Base using Entity Framework DB first approach
In this article i want to explain how to create ASP.net MVC Application with Oracle Database using Entity Framework DB first approach.
first you have to install visual studio, i’m going to demonstrate using Visual Studio 2015, because at the moment Oracle provided Oracle Developer tools for Visual Studio up to visual studio 2015 version. then you have to install Oracle Data base in your local machine or you can access remote Oracle DB.
you can download Oracle Developer tools using this Link
After successfully installing Visual Studio and Oracle Developer tools (ODT), lets go to steps ,
Step 01
Open Visual Studio and Create Empty ASP.net MVC Project.


Step 02
Then you have to install Oracle Managed DataAccess and Oracle Managed DataAccess Entity framework packages using Nuget package manager to your Project.
after successfully installing Oracle Packages you can see those packages inside the references.


Step 03
Then you have to connect oracle Connection to Visual Studio Data Connections by Providing Oracle Connection Properties.


Step 04
Then add ADO.net model to your project, in this process you have select your connection and Database properties such as Tables , Views etc.
After that it will create Database Context and model entities in side your project.then you will see the Model entity classes inside your project.


Step 05
Then you have to provide password for Web Config connection String, because in Context and Model Generating process it will not provide password for your connection string.

Step 06
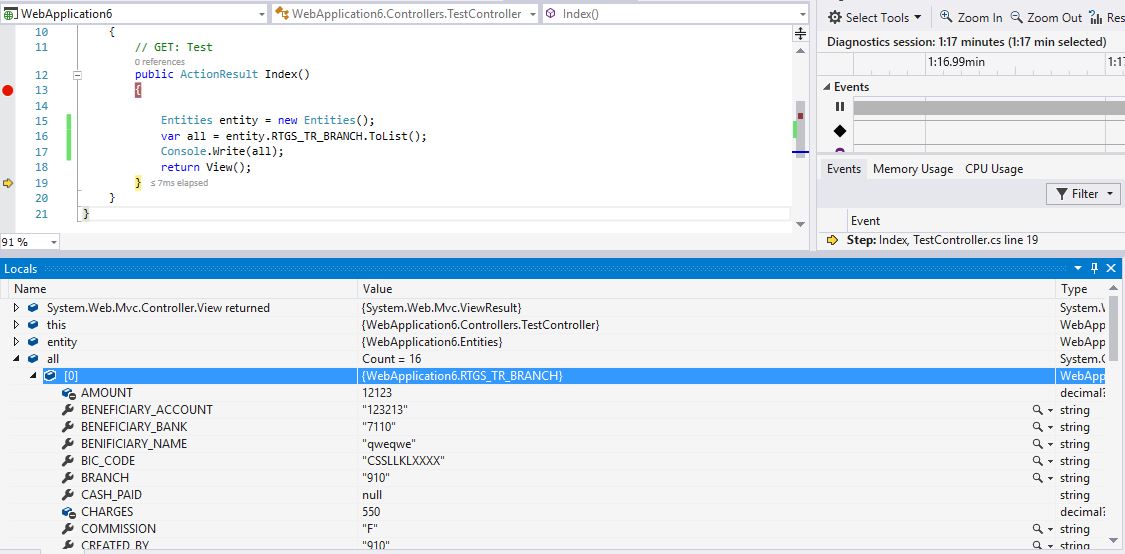
Now Almost done, you can call Database and Retrieve Values from Database.
i have create new controller and Access connected database using Context (Entities).
Note : if you get Exception like below while run the application ,
Type is not resolved for member ‘Oracle.ManagedDataAccess.Client’
you have register you oracle Manage data access in Global Assembly Cache (GAC).
Below is the Steps of Register Oracle Managed Data Access in GAC.
Set Path to Oracle Managed Data Access stored in :
C:\Windows\system32>cd E:\ud\packages\Oracle.ManagedDataAccess\
then Run Below command to add GAC
E:\ud\packages\Oracle.ManagedDataAccess\>”C:\Program Files (x86)\Microsoft SDKs\Windows\v8.1A\bin\NETFX 4.5.1 Tools\gacutil.exe” /i Oracle.ManagedDataAccess.dll
if Successfully Added to GAC you will see below messege in CMD,
Microsoft (R) .NET Global Assembly Cache Utility. Version 4.0.30319.33440
Copyright (c) Microsoft Corporation. All rights reserved.
Assembly successfully added to the cache
Thanks….
Error: Unable to Start Program- An operation is not legal in the current state
Few days back , i have got an error when i’m doing debugging on Visual Studio 2017,
The Error is,
Unable to Start Program – An operation is not Legal in the Current State.
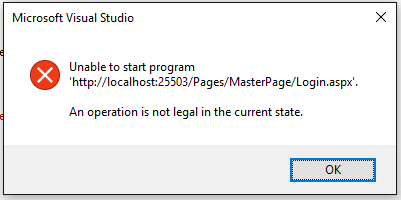
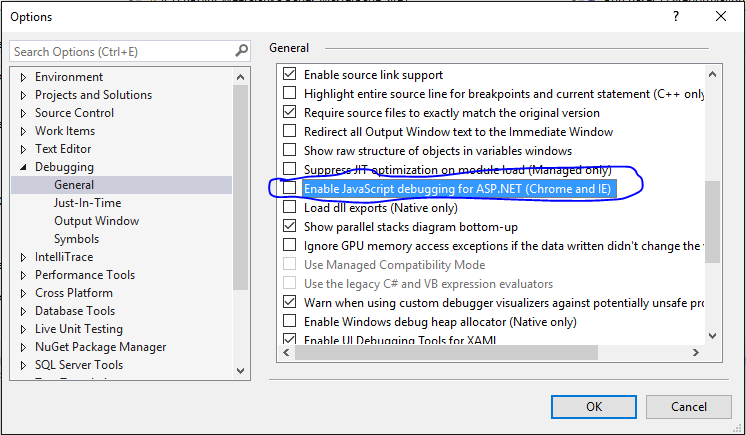
the solution is unchecked the java script debugging in Chrome & IE.
Go to Tools in Visual Studio –> Options –> Debugging –> General
Happy Coding !
Error: Microsoft Report Viewer item (RDLC) not available to add in Visual Studio 2017
Hi all,
I got this problem when i’m working with Visual Studio 2017. i had requirement to add Microsoft Report Viewer (RDLC) file to my project, but when i go to add new item , there is no any reporting component to add to project.
I do three ways to resolve this issue.,
First :
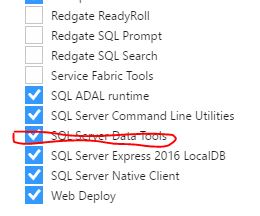
Run the Visual Studio 2017 Setup file and check SQL Server Data Tools installed or Not.if not please install it.
Second:
Install Microsoft Repo,rt Projects for Visual Studio using below link
Microsoft Report Projects for Visual Studio
after install the Microsoft Report Projects for Visual Studio you can use reporting as separate project.
you can add report project into solution under Business Intelligence category.

Third :
Install Microsoft Rdlc Report Designer for Visual Studio using below link
Microsoft Rdlc Report Designer for Visual Studio
After install Microsoft Rdlc Report Designer,you can add Microsoft Report Viewer File (RDLC) to your project.

If is there any Issue with above steps, feel free to contact me,
Thanks,
Udara.
Happy Coding !
Visual Studio 2017 Offline Installer
Hi Guys,
Visual studio 2017 offline installer not available in Visual Studio Official Site,there is only online installer for download.so here i have Shared link for Visual Studio 2017 Offline Installer,
Link : https://www.mediafire.com/?37ib8xn2bs7xbjd
Zip password : UdaraDev2017
if is there any issue with installer, please let me know.
Happy Coding !
Send Email in SharePoint Online Using SharePoint Client Object Model (CSOM)
HI, Below i have figured how to send Email in SharePoint Online using SharePoint Client Object Model (CSOM).
In this case i have used “Microsoft.SharePoint.Client.Utilities”
This is a commonly used method to send email. You can use a SharePoint Utility class to send an Email. One downside is that you cannot send to external users. If you are sending to external users they should be added to your mail exchange. That needs to be done in advance since it will take some time to reflect such changes.
Below is the Simple Code,
using (var EmailclientContext = clientContext)
{
var emailprpoperties = new EmailProperties();
emailprpoperties .BCC = new List<string> { “udara@udaradevlab.onmicrosoft.com” };
emailprpoperties .To = new List<string> { “udara@udaradevlab.onmicrosoft.com” };
emailprpoperties .From = “testuser@udaradevlab.onmicrosoft.com”;
emailprpoperties .Body = “<b>Hi Udara, You receive a test Mail</b>”;
emailprpoperties .Subject = “Mail Testing”;
Utility.SendEmail(EmailclientContext , emailprpoperties );
EmailclientContext .ExecuteQuery();
}
Thanks,
Udara
Enable Custom Scripts on SharePoint Online (O365)
Custom Scripts are disabled on SharePoint online by default. if we need to add some custom scripts or need to access your SharePoint Online Site using SharePoint Designer you need to allow custom scripts.
When you are going SharePoint Admin center in Office 365 portal, you can find setting tab ,after click on that you can find custom script title. by default these features are disabled.

if you need to add custom scripts or SharePoint Designer Access to the SharePoint Online Site, you should allow these two.
you can allow custom scripts by two ways.
- Allow by using SharePoint Admin Center (Change using by above screen), but it takes up to 24 hours to allow custom scripts on SharePoint Online Site.
- Allow by using SharePoint Online Management Shell, its very simple you need to run some power shell scripts.
To Allow custom scripts by using SharePoint Online Management Shell, you have to follow below steps,
- Download & Install SharePoint Online Management Shell, Click Here to Download SharePoint Online Management Shell.
- Open SharePoint Online Management Shell.Connect SharePoint site by providing SharePoint Site Credentials, run below power shell script on SharePoint Online Management Shell.
Connect-SPOService -Url “Site Url” -credential “User Name”
Use SharePoint Admin Center Url for Connect SharePoint Online (eg. https://udara-admin.sharepoint.com).
- Allow custom scripts by using below power shell script, run this,use
Set-SPOsite “Site Url” -DenyAddAndCustomizePages 0
After successfully run above Scripts now you can add custom scripts on SharePoint Online Site.
Hope you Learned Something,
Thanks,
Udara Eshan.
Clear SharePoint Designer Cache
Sometimes SharePoint Designer 2013 gets confused and Not Respond. One way to get it back on track is to reset it’s cache. Here is how,
Steps:
- Close SharePoint Designer.
- Delete all at : %USERPROFILE%\AppData\Local\Microsoft\WebsiteCache
- Delete all at : %APPDATA%\Microsoft\Web Server Extensions\Cache
- Go to SharePoint Designer options –> General –> Application Options –> Uncheck the “Cache site data across SharePoint Designer sessions”
ASP.NET Form Control Validation using Java Script and JQuery : Validate DropDown List in side the ASP.net Grid View

Here i would like to explain how to validate Drop Down List in side the Grid View,It’s very Simple.
var GridView = document.getElementById(‘<%=Grid.ClientID %>’);
var DropDownArray = new Array();
for (var i = 0; i < DropDownArray .length; i++) { //Looping Dropdown list Array to validate
if (DropDownArray .item(i).value == ‘Pending’) //If dropdown has no selected value
{
//Put Validation Message
return false;
}
}
Thanks…
